We’re going to take a look at the Peoplevox pick and sort to trolley feature. So what does it do? Pick and sort to trolley allows you to pick multiple orders in an efficient pick route, whilst directing the picker to sort the items into specific locations ready for dispatch. It’s great for picking clothing, cosmetics or anything where you have multiple item orders with products within a similar size range.
Before you start, you’ll need to set the permissions for each role that require access to the pick and sort to trolley functionality. Go to the roles tab on Peoplevox and enable the settings as shown in the pictures on the slide.

Pick and sort to trolley will work with any of your standard dispatch type locations; any barcode container that you normally pick in to will work. If your trolleys use totes or pick bins specific to the process, you may wish to create separate locations in your hierarchy.
Or you can create trolley locations and have fixed dispatch locations under them, if you want the locations to be permanently associated with the trolley. The decision will be determined by your physical setup: mainly, are the locations on the trolley fixed or are they removable and can be separated?
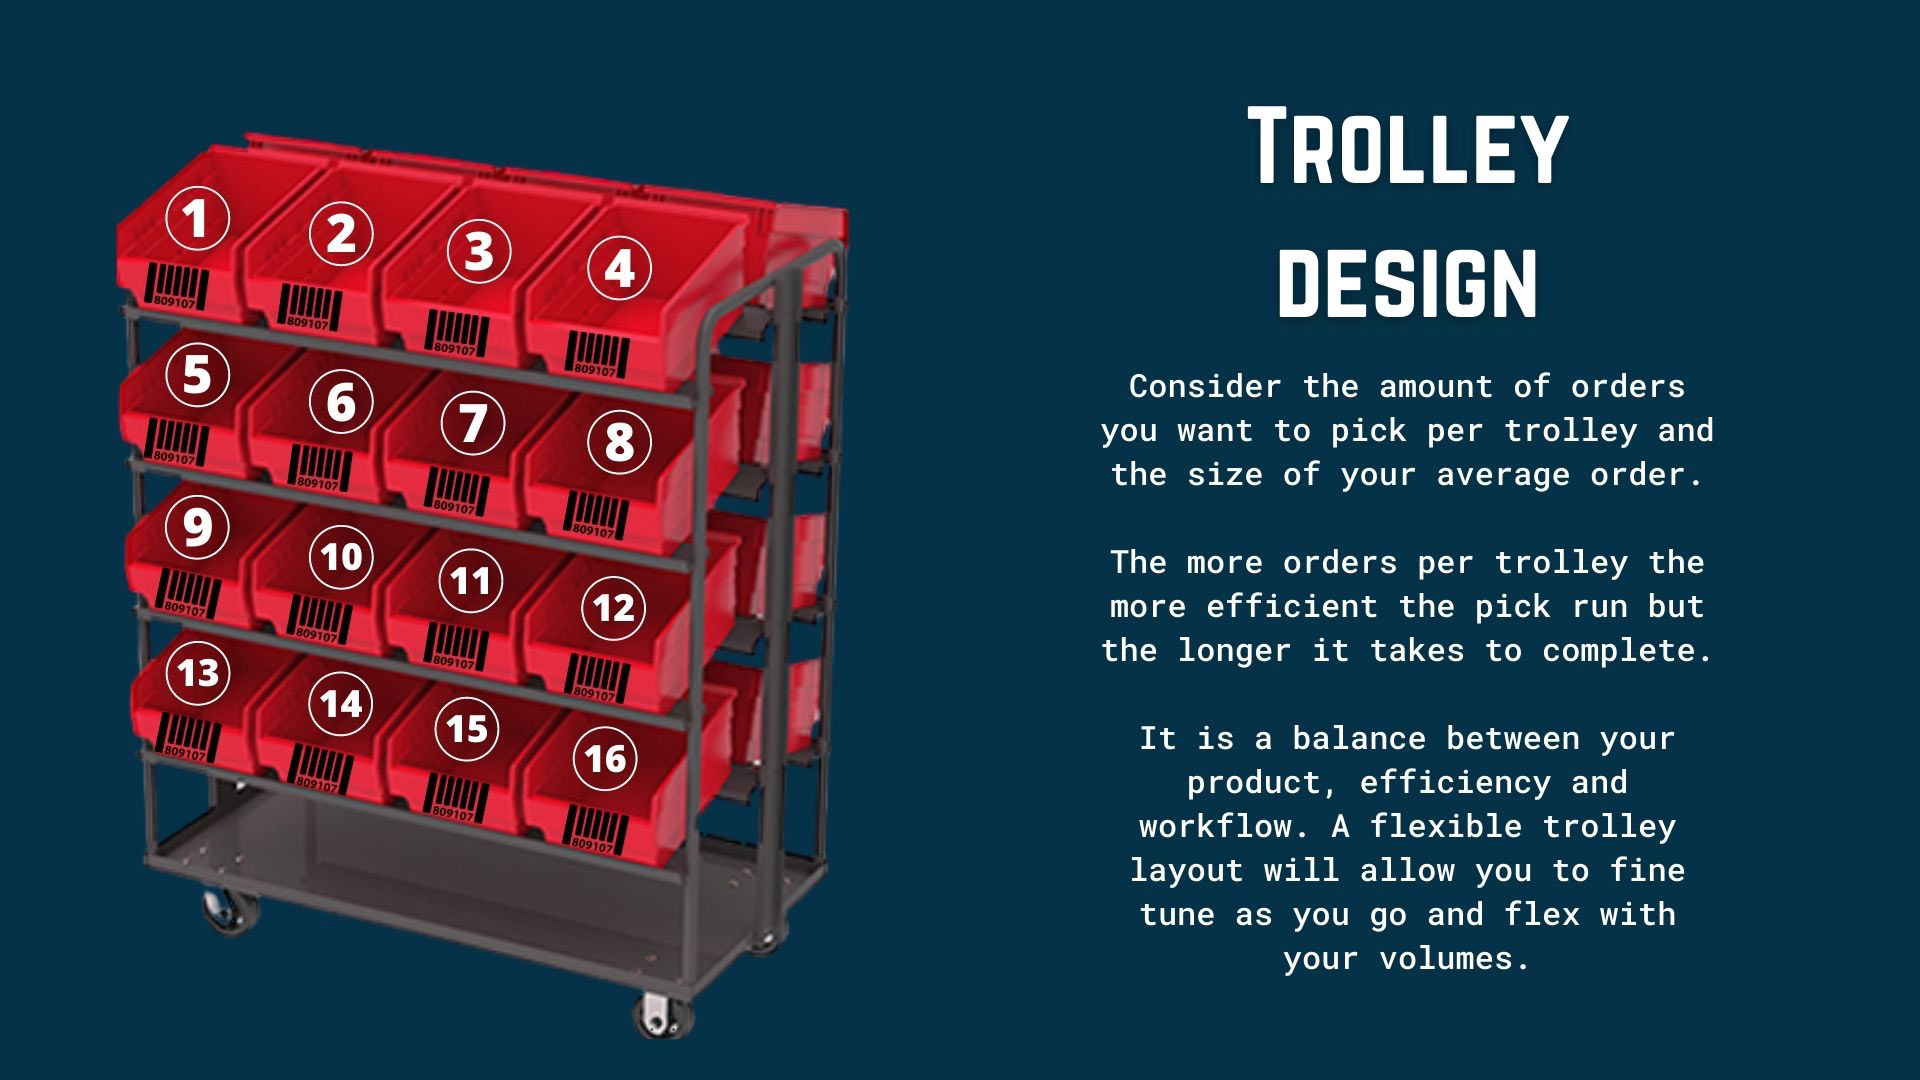
When you’re designing your trolley, you need to consider the amount of orders that you want to pick per trolley and the average size of the order. The more orders per trolley, the more efficient your pick run will be, but the longer it will take to complete. It’s a balance between the size of your products, efficiency and workflow getting the completed trolley to the dispatch bench. A flexible trolley layout will allow you to fine tune as you go and flex up and down with your volumes.

Each location on the tray must be a dispatch type location, and it must be barcoded. The number of positions on the trolley must follow the same logic on every trolley. This is where the Android device will direct the picker to place the picked items.
Label the trolley position numbers – not the bins (unless the bins are fixed on the trolley). The pick bins can change – positions must stay static.
In the example you see here, the bins always stay with the trolley. So they have dispatch type location barcodes and also the sequence numbers on the grey pick bins. It’s very important that you understand where the sequence of the trolley goes. And it’s the same on every trolley. Every time you use a trolley, the sequence is in the same order – this means your pickers aren’t getting confused with different orders on different trolleys.
On this example, right at the top of the front of the trolley, you’ve got position one, position two, position three, working back towards where the picker will be pushing from, and then it carries on down the trolley. That stays the same on every single trolley so there is no confusion.
When you start picking, the Android device will direct you to put the first item you pick in position one, each subsequent item for a new order will be directed to the next empty position in ascending numerical order. When you pick an item for existing order, the system will direct you back to the position that holds the item for that order.
So item one, you will go and you’ll place it in location position one.
Item two is for a new order you placed it in position two.
Item three is for a new order – placed in position three.
The fourth item you pick is for order number one, it directs you back to position number one to put it with the rest of the items for that order.
When creating an action, you’ll need to use the pick and sort to trolley action type. Then you’ll need to select all the required sales orders followed by the number of sales orders per batch. This must be equal or less than the amount of locations on your pick trolley. If I have 16 locations on my pick trolley, the batch size needs to be 16 or less. Otherwise, you’re going to have more orders than locations on your trolley.
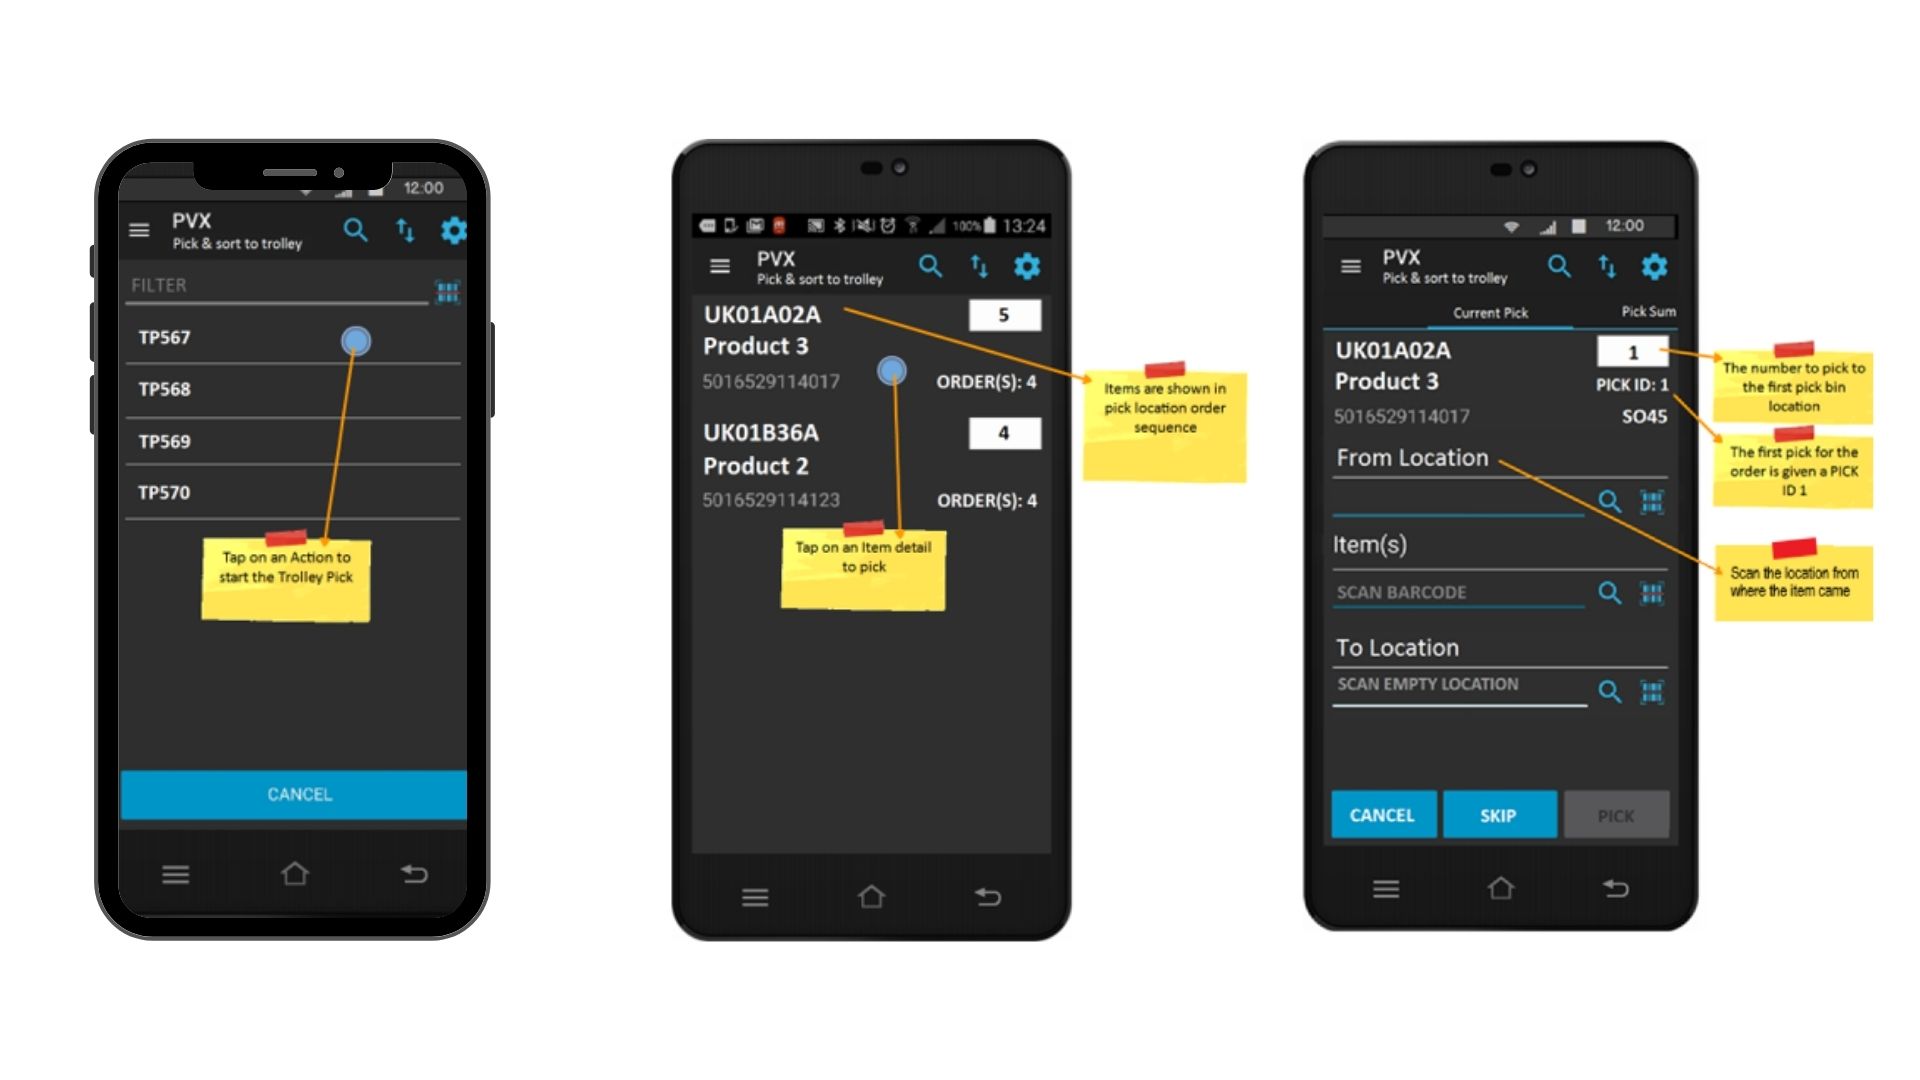
Now let’s take a look at the Android screens. You need to select pick from the drop down menu and then go to pick and sort to trolley. You’ll then see a list of available actions. Once you’ve selected the action that you want to pick, you’ll see a list of the items that need picking for the action. Select the top result to start picking. You’ll now see that the item detail that needs to be picked is in the top left hand corner, opposite that you have the quantity to be picked in the white box. And below that, important for this process, is the pick ID. This pick ID is the position on the trolley that you’re going to place your item. It’s very important you pay attention to that.

Here we see a breakdown of the pick screen: you have the item detail quantity and pick ID at the top, followed by the location the item came from; the Item Barcode field, and the Quantity field with quantity remaining in the white box on the right, and lastly the ‘to’ location. This ‘to’ location is the barcoded location on the trolley that you’re scanning the items into in the position that the pick ID directs you to. Then at the bottom, you’ve got the complete pick button to progress.
If you swipe left from the screen, you get this summary screen which gives you an update of progress in regards to what has been picked, what needs to be picked. And that’s good for troubleshooting or just checking on general progress of the pick.
Once you’re at that point, and you’ve picked everything on the pick list, you should have a trolley full of completed orders. This is now ready to take to dispatch. You scan one of the dispatch locations of the trolley into the dispatch screen on Peoplevox. And from here the process mirrors the dispatch process for any pick method. You’ll scan across all of the individual items from the left hand side of the screen to the right hand side of the screen and then complete the dispatch process as normal.


